Sea Turtle Applique Crochet Pattern
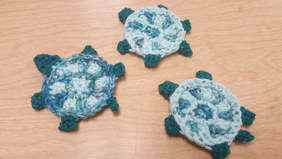
Turtle is about 3 1/2" long or 4 1/2" for the larger version.
KEY
c1 = color 1
c2 = color 2
c3 = color 3
ch = chain
sc = single crochet
dc = double crochet
sl st = slip stitch
FO = finish off
SHELL: With c1 create magic ring
R1: ch1, sc6 into magic ring, sl st to ch1 at beginning of round (6 st). Attach c2 but do not FO c1 (you will pick it back up on the 3rd round)
R2: (crochet in/over short end of c2 during this round) With new color, ch1, sc into first sc, sc2 into each of the other sc around, sl st into first ch1 from this round to join (12 st)
R3: ch2, dc into first sc, pick up the other colored yarn by yarning over with it then 2dc into next sc with it, yarn over with other colored yarn and 2dc into next sc. Keep alternating colors of yarn all the way around and sl st back to the first ch2 from this round. Choose which of these 2 colors you will use for the last round. Sl st into that color if you don’t have it already on hook, then cut the other color to about 2-3”. You will crochet in/over this end tail on the last round. Turn your work.
R4: (from back side of shell) ch 1, sc in each stitch all around, sl st to first ch1 of round and FO.
HEAD: From back side of shell, connect c3 (or whatever color you wish), ch1. (I connected to first actual sc from border of shell, to the left of the ch1.)
R1: sc into next 2 inside loops. Turn.
R2: ch1, sc into each sc. Turn.
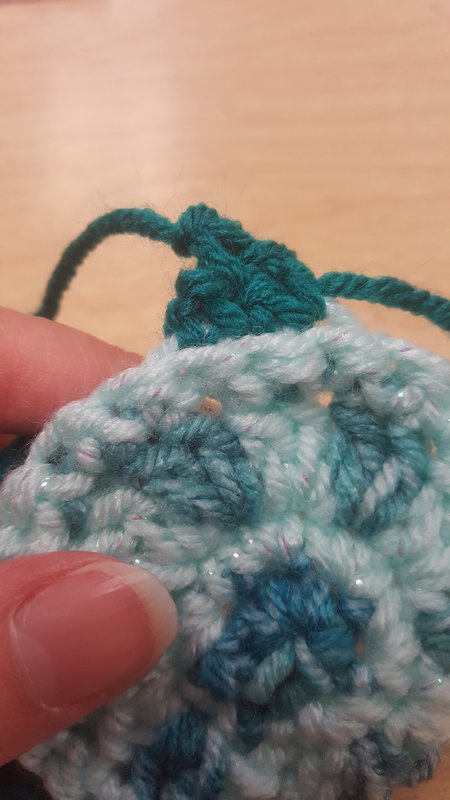
R3: ch1, sc into last st of previous round (decrease), sl st, FO. FO pics below, figure 3 and 4.
LEGS:
Still working from under side of shell, each leg uses, 3 inside loops. Since I am right-handed and always work towards the left, here is how I counted loops to start my legs:
Front leg: to the right of head, start in 5th inside loop from head (working towards the head). There should be 2 empty inside loops between finished front legs and head.
Front leg: to left of head start in 3rd inside loop from head.
Back leg: to left of front leg, start in 3rd empty inside loop. There again 2 empty inside loops between the front and back legs.
Back leg: to right of front leg, start in 5th empty loop (working towards the head)
For each leg: connect yarn, ch., sc in next 2 loops, turn. Ch1, sc to last sc, sl st, FO.
TAIL:
Connect yarn to middle inside loop between the 2 back legs. Ch2, sl st in first ch from hook, sl st into same loop of shell, or into loop beside if you counted an even number of empty loops between back legs. FO both ends of the yarn in the tail.
KEY
c1 = color 1
c2 = color 2
c3 = color 3
ch = chain
sc = single crochet
dc = double crochet
sl st = slip stitch
FO = finish off
SHELL: With c1 create magic ring
R1: ch1, sc6 into magic ring, sl st to ch1 at beginning of round (6 st). Attach c2 but do not FO c1 (you will pick it back up on the 3rd round)
R2: (crochet in/over short end of c2 during this round) With new color, ch1, sc into first sc, sc2 into each of the other sc around, sl st into first ch1 from this round to join (12 st)
R3: ch2, dc into first sc, pick up the other colored yarn by yarning over with it then 2dc into next sc with it, yarn over with other colored yarn and 2dc into next sc. Keep alternating colors of yarn all the way around and sl st back to the first ch2 from this round. Choose which of these 2 colors you will use for the last round. Sl st into that color if you don’t have it already on hook, then cut the other color to about 2-3”. You will crochet in/over this end tail on the last round. Turn your work.
- To make a little larger turtle, instead of yarning over with alternating colored yarn on this round, use a sl st to pull in each color. This will give you about 12 extra stitches and just adjust where you want to add each leg and tail to shell.
R4: (from back side of shell) ch 1, sc in each stitch all around, sl st to first ch1 of round and FO.
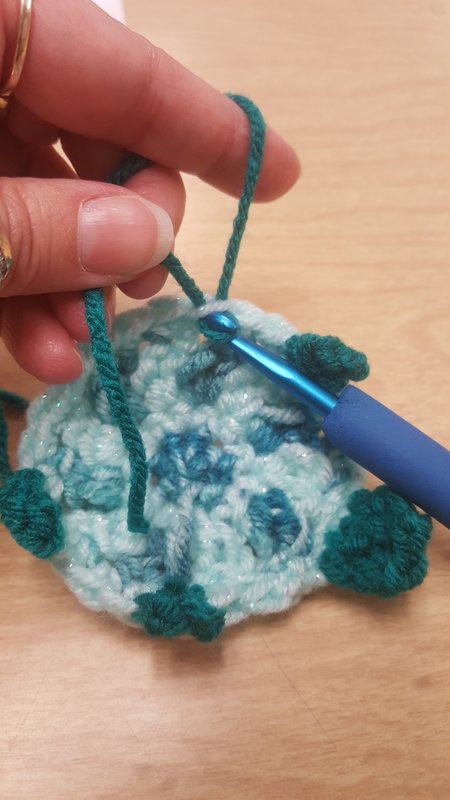
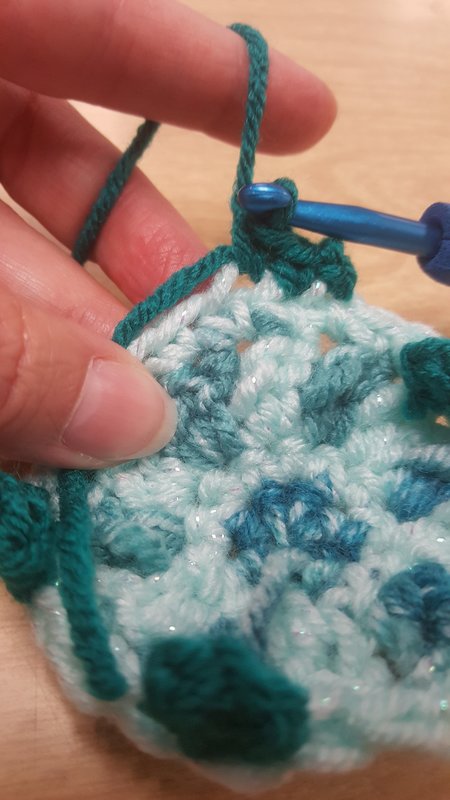
- Head, legs, and tail will be added from underside of the shell and only to the inside loop of the shell’s last sc border. To connect yarn, pull up a loop, leaving a 2-3” end to be crocheted in/over on the beginning sc of each item. Connect with a ch1. See figure 1 and figure 2 below.
HEAD: From back side of shell, connect c3 (or whatever color you wish), ch1. (I connected to first actual sc from border of shell, to the left of the ch1.)
R1: sc into next 2 inside loops. Turn.
R2: ch1, sc into each sc. Turn.
R3: ch1, sc into last st of previous round (decrease), sl st, FO. FO pics below, figure 3 and 4.
LEGS:
Still working from under side of shell, each leg uses, 3 inside loops. Since I am right-handed and always work towards the left, here is how I counted loops to start my legs:
Front leg: to the right of head, start in 5th inside loop from head (working towards the head). There should be 2 empty inside loops between finished front legs and head.
Front leg: to left of head start in 3rd inside loop from head.
Back leg: to left of front leg, start in 3rd empty inside loop. There again 2 empty inside loops between the front and back legs.
Back leg: to right of front leg, start in 5th empty loop (working towards the head)
For each leg: connect yarn, ch., sc in next 2 loops, turn. Ch1, sc to last sc, sl st, FO.
TAIL:
Connect yarn to middle inside loop between the 2 back legs. Ch2, sl st in first ch from hook, sl st into same loop of shell, or into loop beside if you counted an even number of empty loops between back legs. FO both ends of the yarn in the tail.